Ensuring that you have an accurate thermometer to check meat’s internal temperature is crucial to prevent serving undercooked food.
Many Masterbuilt smokers come with a leave-in meat thermometer. Although handy, they can be finicky (at least in my experience).
Keep reading to learn how to calibrate it and fix common issues that may arise.
Key Takeaway
You can calibrate your Masterbuilt temp probe by placing it into a cup of water with plenty of ice. It should read 32°F. If the thermometer is inaccurate, clean the sensor and ensure the connectors (under the control panel) are secure. If that doesn’t work, you may need to replace the part.
What Does the Masterbuilt Meat Probe Do?
Unlike instant-read thermometers that require you to constantly poke the meat whenever you want to see the temperature, a leave-in thermometer stays inside the meat throughout the cooking process.
You insert it into the thickest part of the meat, and you can monitor its internal temperature in real-time without opening your smoker. Lifting the lid too much may prevent your smoker from heating up.
How to Calibrate a Masterbuilt Meat Probe
Below are two helpful ways to ensure your thermometer is providing accurate readings.
Option 1: The Ice-Point Method
The ice-point method allows you to calibrate the sensor by inserting the probe into ice water.
Here are the steps:
- Fill a large cup with a mixture of ice and water, consisting of about three parts ice to one part water.
- Submerge the probe’s tip into the mixture, not touching the sides or bottom of the cup.
- Allow the probe to sit in the ice-water mixture for a few minutes to stabilize.
Once stabilized, the screen should read 32°F. If not, jump to this section.
Option 2: The Ambient Temperature Method
To use the ambient temperature method, you’ll need to move your smoker to a location with a more controlled temperature, such as your garage or inside your house.
Follow these steps:
- Place the probe in an area with a stable ambient temperature, like a room with constant temperature control.
- Avoid touching the probe’s tip while positioning it, and allow it to rest for several minutes.
- Compare the temperature reading to the known room temperature.
If there’s a discrepancy between the room temp and the probe reading, skip to this section.
Common Reasons Why the Ice-Point or Ambient Temperature Methods May Fail
Here are some reasons that the above tests may not work. Double-check these items to ensure you didn’t overlook anything.
- You may have held the probe’s tip for too long
- You didn’t let it sit long enough
- You didn’t have a consistent ambient temperature
- Ensure the probe’s connector is firmly seated into the controller
- Confirm the controller isn’t displaying error codes
Note
Unlike an analog thermometer, you can’t adjust the Masterbuilt digital thermometer if it’s wrong. Instead, take a mental note of the degrees it’s off by and then factor that in or consider buying a replacement.
How to Troubleshoot Your Masterbuilt Temp Probe
Perform the steps below if you’ve determined your thermometer is showing the wrong temperature.
Check for Error Codes
Occasionally, the screen on your controller may display error messages. Here are the common errors you may encounter specifically for the probe.
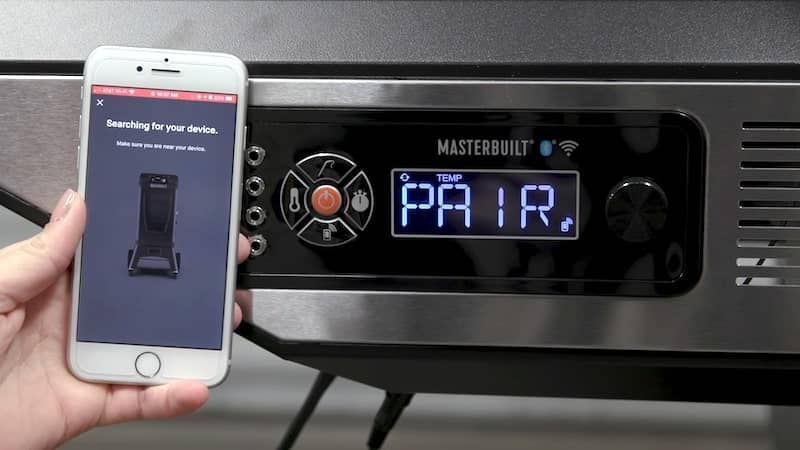
Error 1
If you see “Err 1,” the probe isn’t fully plugged in. Here are the steps to troubleshoot:
- Unplug the smoker from the power source
- Remove the screws holding the control panel in place
- Inspect the wires coming from the control panel
- Disconnect then reconnect the wire going to the probe
- Ensure the connectors are snug
- Plug the smoker back in
Error 2
Your temperature probe has malfunctioned if you see “Err 2” on the screen.
In that case, contact Masterbuilt support and ask for a replacement. They’ll likely send you a new one (for free) if your unit is still under warranty.
Ensure the Connectors Aren’t Loose
Even if “Err 1” doesn’t appear on the screen, you may have a loose connector preventing the probe from communicating with the controller.
It’s worth checking the connectors to ensure they’re snug. Additionally, you can use compressed air to remove any debris in the connector.
Remember to unplug your smoker before doing any of these tasks.
Clean the Probe With a Cloth
Soot and other build-up can cause the temperature sensor to produce inaccurate results. If you’ve used your smoker quite a bit, then you may need to clean the probe.
How to safely clean the probe:
- Disconnect the smoker from its power source.
- Gently wipe the exterior of the probe with a damp cloth and mild soap, avoiding submerging it in water.
- Clean the sensing end of the probe using a soft brush or cloth, warm water, and mild soap.
- Rinse off any soap residue and pat dry with a clean cloth.
- Ensure the probe is completely dry before reattaching it.
Regularly cleaning the meat probe helps maintain its accuracy and longevity.
Consider Buying Replacement Parts
If you’ve gone through the troubleshooting steps and your meat probe still doesn’t produce accurate readings, it’s time to consider a replacement. You can contact Masterbuilt for a new part.
Remember
Many leave-in thermometers have a +/- 5°F tolerance, so slight variations are normal.
Frequently Asked Questions
Still have questions about calibrating your Masterbuilt meat probe? Browse the answers below.
Where Should You Insert the Probe?
To get an accurate temperature reading, insert the probe into the thickest part of the meat and be careful not to touch any bones.
Is the Masterbuilt Meat Thermometer Accurate?
The Masterbuilt meat probe is reasonably accurate. Although it’s less reliable than a separate leave-in thermometer, it does the job for most average users. However, accuracy issues arise when the probe is damaged or covered in grease or soot build-up.
What Is a Dual Probe Thermometer?
A dual-probe thermometer allows you to monitor the meat and the smoker’s ambient temperatures simultaneously. One probe goes into the meat, and the other rests in the smoker to measure the cooking temperature.
Can You Test the Thermometer’s Probe in Boiling Water?
Yes, you can test the probe in boiling water (212°F). However, you’ll need a pot of boiling water beside your smoker since the Masterbuilt leave-in thermometer is attached to the unit.
Final Thoughts
Cooking temperature is a critical factor in smoking meat. So calibrating your Masterbuilt thermometer is a simple yet important task that ensures you cook meat to the correct temperature.
Accurate temperatures reduce the risk of foodborne illness (or prevent overcooking).